
This post explains advanced uses of headers and footers. The template changes between two fancy pagestyles and provides a TikZ based header and a – alsoTikZ based – final footer which only appears on the very last page of the document (which LaTeX will determine on its own without you setting it explicitly).
[Markdown is kind of broken in this post. Parts of it were repaired but other parts seem stubbornly broken (and break over and over again), so I decided that it will be ok to stay like this. If you’re interested in the information – it’s all here. It doesn’t look so good but that you should be able to survive 😉 ]

This post is not intended for beginners who just want to make simple use of the basic fancyhdr features. A great explanation of these can be found in the ShareLaTeX tutorial (see “Resources” section below).
So if you don’t care to read the following (long) explanation of these advanced header / footer uses, just use my Overleaf template and come back here if you want to customize something to get information you need. All the facts are here.
You can find it here. It’s a view-only share link to the template I created but I can’t publish it as a template via Overleafv2, so have fun with the link (hopefully this will be possible later). Just copy it as your own project or something.
The code can be found in full in the Overleaf template and has extensive comments. I will, however, explain all the snippets even more in detail in this post, so you can understand what I did and why I did it. Especially because the code to create this might be overwhelming to you in whole if you haven’t done a lot of advanced LaTeX customizing so far.
General settings for our document
This is the preamble, not a lot to explain here so far, so just the code:
\documentclass[10pt, a4paper]{article}
\usepackage[utf8x]{inputenx}

% Page Settings
%--------------------------------------------------------------------
\usepackage{geometry} % Allows the configuration of document margins
\geometry{includeheadfoot,a4paper, textwidth=0.87\paperwidth, textheight=0.8\paperheight}
\usepackage[onehalfspacing]{setspace}

\usepackage{lipsum} % provides lorem ipsum for testing

% Font Settings
%-------------------------------------------------------------------
\usepackage{lmodern} % http://www.tug.dk/FontCatalogue/latinmodernroman/
\usepackage[thin]{raleway} % different font for the TikZ header
\usepackage{url}
And some further settings here:
%\\\\\\\\\\\\\\\\\\\\\\\\\\\\\\\\\\\\\\\\\\\\\\\\\\\\\\\\\\\\\\\\\\
% Settings for Fancy Headers and Footers
%-------------------------------------------------------------------

% Settings for TikZ Headers with coloured background
%-------------------------------------------------------------------
\usepackage{atveryend}
\usepackage{lastpage}

\usepackage[usenames, dvipsnames]{color} % https://de.sharelatex.com/learn/Using_colours_in_LaTeX#!#Reference_guide z.B. \color{RubineRed} - use ColorNames
\usepackage[dvipsnames]{xcolor}
\definecolor{CornflowerBlue}{RGB}{100,149,237} %#6495ed (HTML) - define your own colors
% pick some from here: http://latexcolor.com/
Setting header and footer with the fancyhdr package
Why is this chapter here? Didn’t I say I was not going to do the basic fancyhdr explanation? Yes, I did indeed. This is why you’ll just get the code snippet with its comments from Overleaf. What I did here is no sorcery and can be understood from the ShareLaTeX tutorial (see “Resources” below). I find that ShareLaTex generally does a great job in explaining the stuff you really need, even as an advanced user. It gives an overview on the most common packages without being as confusing as their package documentations. Definitely worth checking! ( https://www.sharelatex.com/learn )
% Settings for "normal" headers and footers
%-------------------------------------------------------------------
\usepackage{fancyhdr} % http://mirror.easyname.at/ctan/macros/latex/contrib/fancyhdr/fancyhdr.pdf
\pagestyle{fancy}

\fancypagestyle{fancy1}{
\fancyhf{} % clear space at the header and footer so the fancy headers / footers can be placed
%-------------------------------------------------------------------
\renewcommand{\headrulewidth}{2pt} % set a head rule of 2pt thickness
%\renewcommand{\footrulewidth}{1pt} % same would be possible if you wanted a footer rule
%-------------------------------------------------------------------

% things you might want to access here: \thesection \thechapter \chaptername \sectionmark \rightmark \leftmark
% check this for further info: https://en.wikibooks.org/wiki/LaTeX/Customizing_Page_Headers_and_Footers

% puts a small logo on the right side of the HEADER - same goes for the \lhead:
\rhead{\includegraphics[width=0.04\textwidth]{logo.jpg}}
\lhead{\footnotesize\textbf{Example citation:} \textsc{Author-Lastname}, Surname: ``Article title'', in: \textsc{Editor} (ed.): \emph{booktitle}, NY 2018. {\textsc{Link:}} \protect\url{http://mylink.com}{ } \lbrack{}\today\rbrack{}.}
% you could you \chead to access the center as well

%-------------------------------------------------------------------
% defines all the FOOTER settings. But in this case, they are conditional: We check if we're on the last page and only print it, if we're not.
\rfoot{\ifnum\getpagerefnumber{VeryLastPage}=\value{page}\else\includegraphics[width=0.1\textwidth]{logo.jpg}\fi}
\lfoot{\ifnum\getpagerefnumber{VeryLastPage}=\value{page}\else{\scriptsize your custom footer text goes here}\fi}

% add the page count in the middle: \thepage gives you the current page, \pageref{LastPage} the total
\cfoot{\ifnum\getpagerefnumber{VeryLastPage}=\value{page}\else\thepage/\pageref{LastPage}\fi}
}
If the part where the if conditions turn up in the footer settings confuse you, don’t worry. I will explain this in the final footer part.

Creating the final footer
Using hooks to find the last page of a document
Finding the last page of a document in LaTeX is not as trivial as it might seem. Sometimes, you might succeed just using \AtEndDocument. But this will only work if the contents of the last page have not been shipped out before LaTeX realizes it needs to check if it’s the last page. Sometimes, this will work just fine. Other times, all the content is already printed once you reach this point. This is why we need the atveryend package which will help us find the real last page of our document by setting some more page hooks after the \AtEndDocument is executed and after the last shipout is done.
In our example, we trigger this behaviour in the fancyhdr part where we check if we’re on the last page. Then, we don’t want fancyhdr to print the footer. Because now, our footer background will executed: That’s right – our final footer is actually a TikZ-based background setting which is only applied to the last page where we disabled the fancyhdr footer.
Having used \usepackage[pages=some]{background}, we could also invoke this background manually anywhere we want like this: \BgThispage. This, however, I found a bit tedious. I wanted to automatically create LaTeX output from XML files using XSLT transformation. So, of course, I wouldn’t be able to manually add \BgThispage at every document’s last page. First of all, because it’s tedious and then, how do you even know where this is if you don’t typeset all the pagebreaks by hand? So I came up with the solution presented here.
(I am not 100% sure, however, if this is the most elegant or failsafe solution possible – always happy to get your feedback!)
%\\\\\\\\\\\\\\\\\\\\\\\\\\\\\\\\\\\\\\\\\\\\\\\\\\\\\\\\\\\\\\\\\\
%-------------------------------------------------------------------
% packages for the custom header and footer
\usepackage{tikz}
\usetikzlibrary{shapes.misc,positioning,backgrounds}

%-------------------------------------------------------------------
% different last page footer
\usepackage[pages=some]{background}
\usepackage{tikzpagenodes}
\usepackage{pageslts,refcount}

%-------------------------------------------------------------------
% credit: https://tex.stackexchange.com/questions/120773/footer-on-last-page
\newcommand{\footercustomlastpage}[3]{% here a command is set
\backgroundsetup{% from the background package
scale=1,angle=0,color=black,%
contents={% contents then contain basically the same TikZ picture as I use for the header
\tikz[remember picture,overlay]{%
\fill[gray!70,ultra thick]%
([yshift=120pt]current page.south west)%
rectangle%
(current page.south east);%
\node[anchor=north west,inner sep=0pt,text width=.75\paperwidth,align=left] at ([yshift=15pt,xshift=50pt]current page.south west|-current page text area.south west) {#1};%
\node[anchor=north,inner sep=0pt,text width=.3\paperwidth,align=right] at ([yshift=-5pt,xshift=90pt]current page text area.south) {#2};%
\node[anchor=north east,inner sep=0pt,text width=.3\paperwidth,align=right] at ([yshift=-5pt,xshift=-30pt]current page.south east|-current page text area.south east) {#3};%
}}}%
}

%-------------------------------------------------------------------
% I made a command for this, so you can put the above in an external file
% and only keep the actual contents of the footer in this main file
% making a new command would, of course, not been necessary
%-------------------------------------------------------------------
\footercustomlastpage{
\begin{minipage}[t]{0.67\textwidth}
{\huge Jack Sparrow image credit: Walt Disney. Thanks, mate!}
\scriptsize\lipsum[56]
\end{minipage}
}{
\includegraphics[width=0.5\textwidth]{jack.jpg}
}{
\includegraphics[width=0.4\textwidth]{logo.jpg}
}

%-------------------------------------------------------------------
%--------------------------------------------------------------------------------- End footer placement
\usepackage{everypage}
% here we determine that the footer (which really is a background constisting of TikZ picture
%will be printed on the very last page only
\AddEverypageHook{\ifnum\getpagerefnumber{VeryLastPage}=\value{page}\clearpage\BgThispage\else\fi}
%\AfterEndDocument{\clearpage\vfill\fancyhf{}\cfoot{}\rfoot{}\lfoot{}\BgThispage}

A possible problem with this solution might be that I never use \thispagestyle{empty}, so your content could possibly overflow into the footer, if the last page is very full. Usually it doesn’t do that and if it does, it can usually be avoided by rearranging the last few pages a little bit. When you don’t do automated transformations like I did, this shouldn’t bother you much. Also, with the geometry settings I used, I found that it wasn’t much of a problem and only a tiny bit visible when I, for example, excessively used footnotes on the last page.
If you want to absolutely ensure that your header and footer are cleared, you have to use \thispagestyle{empty}, which will overwrite \pagestyle{fancy} we set at the beginng, but for the current page only. Mind you though, this will not only affect the footer section but cause you to have no header as well. This is why I don’t do it and accept some minor overflow as the tradeoff.
\thispagestyle{plain} will remove the header and footer for one page but at least will keep the page numbering in the footer, by the way. Non-fancy, LaTeX automatically created centered page numbering, that is. So no “page 3 of 3”. Just “3”.
The header using a TikZ background
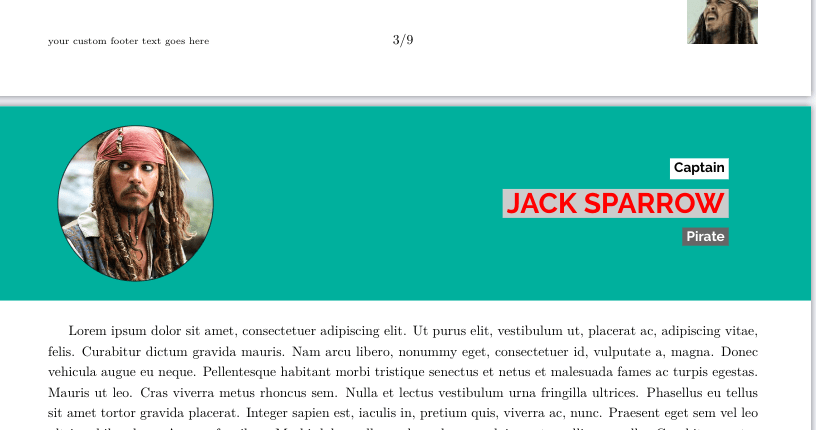
The header command I created resembles the footer in the way that it is also a TikZ background, only this time it’s not set to be transparent (like above) and it’s at the top of the page. This time, I also want to be able to use this for every page I want, whenever I want. (We could configure it as a replacement / version of \maketitle which some people do in custom CV templates, but I prefer it this way. It keeps me in control of my document.) While the footer just has three textareas you can fill as you please, the header has one circle for a picture and three spots for text. It’s a header I configured for a CV template, so feel free to make your own version of this header command to fit your needs.
%-------------------------------------------------------------------
% inspired by: https://www.sharelatex.com/templates/cv-or-resume/fancy-cv
\newcommand{\header}[7]{
\thispagestyle{header}
\tikz[remember picture,overlay] {%
\node[rectangle, fill=#5, anchor=north, minimum width=\paperwidth, minimum height=5cm](header) at (current page.north){};%
\node[left=#7 of header.north, anchor=east](name) at (header.east) {\fontfamily{\sfdefault}\selectfont #2};%
\node[anchor=south east](degree) at (name.north east) {\fontfamily{\sfdefault}\selectfont\flushright #1};%
\node[anchor=north east](descr) at (name.south east) {\fontfamily{\sfdefault}\selectfont #3};%
\node[right=#6 of header.west, anchor=west](picture) at (header.west) {};%
\draw[path picture={\node[anchor=center] at (path picture bounding box.center){\includegraphics[height=4.3cm]{#4}} ;}] (picture) circle (2) ;}%
\vspace{1.5cm}%
}
%-------------------------------------------------------------------
For this command to work, I had to ensure there was more than one fancy pagestyle available because we don’t want a normal header displayed when using this special one. Also, the special header needs some tweaking with geometry etc. because it’s larger and in the fancyhdr package, we have the problem that the footer will disappear when \headheight becomes too large. In our case, large means 5cm – that’s too large for fancyhdr.
So we set a new geometry locally for the page the header command is used on and restore it afterwards. We also activate the pagestyle for these pages only by using \thispagestyle{header} instead of \pagestyle{header}.
\usepackage{afterpage}
\fancypagestyle{header}{
\newgeometry{includeheadfoot,a4paper, textwidth=0.87\paperwidth, textheight=0.7\paperheight, top=3cm, headheight=0cm, headsep=0cm}

\fancyhf{} % clear space at the header and footer again
%-------------------------------------------------------------------
\renewcommand{\headrulewidth}{0pt} % get rid of the headrule

%-------------------------------------------------------------------
% defines all the FOOTER settings to work as above.
% We still check if we're on the last page and only print it, if we're not.
\rfoot{\ifnum\getpagerefnumber{VeryLastPage}=\value{page}\else\includegraphics[width=0.1\textwidth]{logo.jpg}\fi}
\lfoot{\ifnum\getpagerefnumber{VeryLastPage}=\value{page}\else{\scriptsize your custom footer text goes here}\fi}

% add the page count in the middle: \thepage gives you the current page, \pageref{LastPage} the total
\cfoot{\ifnum\getpagerefnumber{VeryLastPage}=\value{page}\else\thepage/\pageref{LastPage}\fi}
\afterpage{\restoregeometry}
}
Styling the header
\fontfamily{\sfdefault}\selectfont selects the raleway font we loaded in the preamble. This is just because I thought it looked good. Do whatever you want.
The command takes a background colour as one argument, the three textareas, the image location and two centimenter values for the placement of the image circle and the texts in the header. The first three arguments are the text areas.
By the way (did I mention this already?), this header command comes from a custom CV template I created. I will show it to you as soon as I’m fully happy with it. But so far, suffice it to say that it was inspired by the friggeri-cv class (as always, see “Resources” for links).

Would you be concerned with exchanging links?
LikeLike
hello – sorry for the late approval – I didn’t really get that I had to approve comments and did not get / see the notification. What do you mean with exchanging links?
Best,
😉
LikeLike
Loving the information on this website , you have done great job on the blog posts.
LikeLike
Thanks, love to hear such positive feedback!
LikeLike
I would like to thnkx for the efforts you’ve put in writing this website. I’m hoping the same high-grade website post from you in the upcoming also. Actually your creative writing skills has inspired me to get my own website now. Actually the blogging is spreading its wings fast. Your write up is a great example of it.
LikeLike